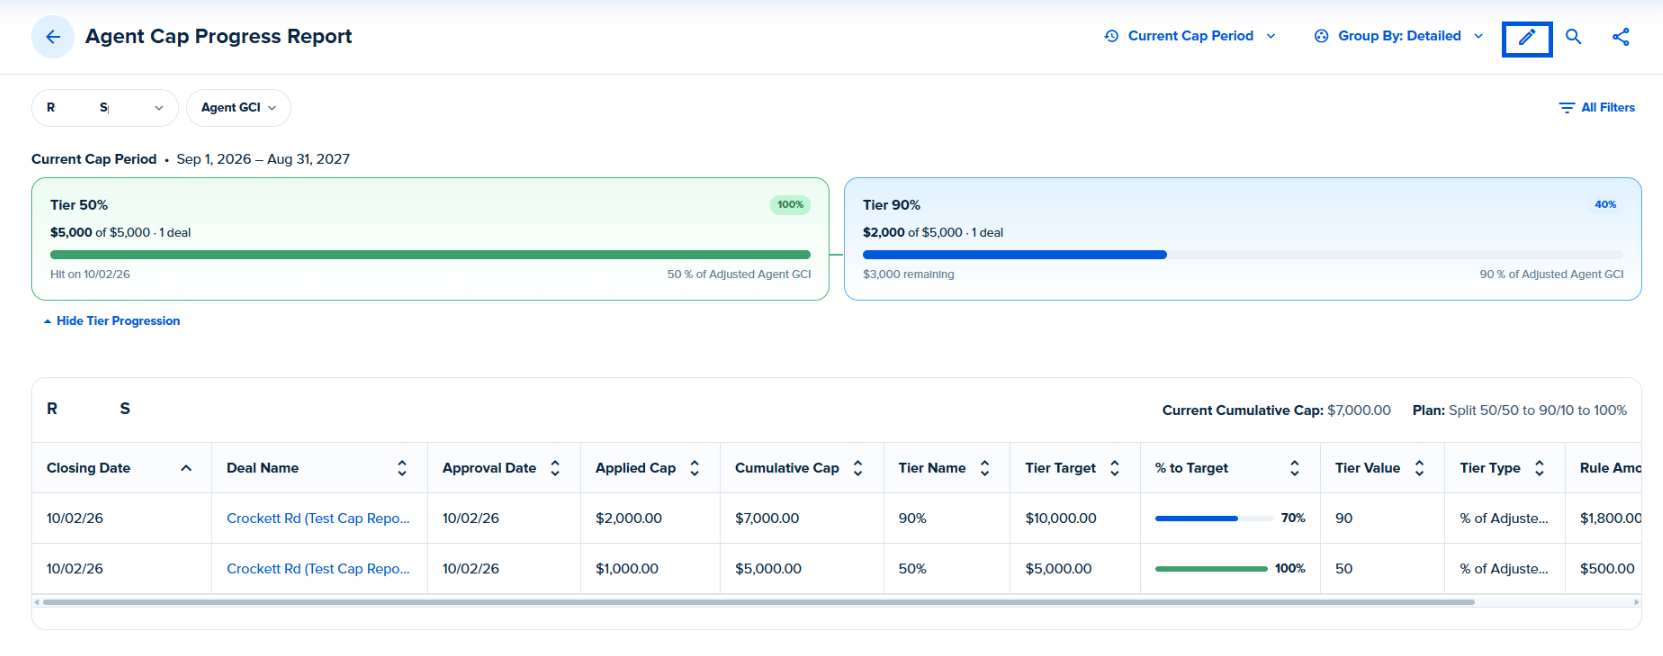
The Agent Cap Progress Report gives you a clear detailed view of an individual agent’s progress through their commission tiers, including their deal by deal cap history. This report will provide a snapshot of where the agent stands today, how much they contributed toward their cap, how much remains and which commission tier they are currently in.
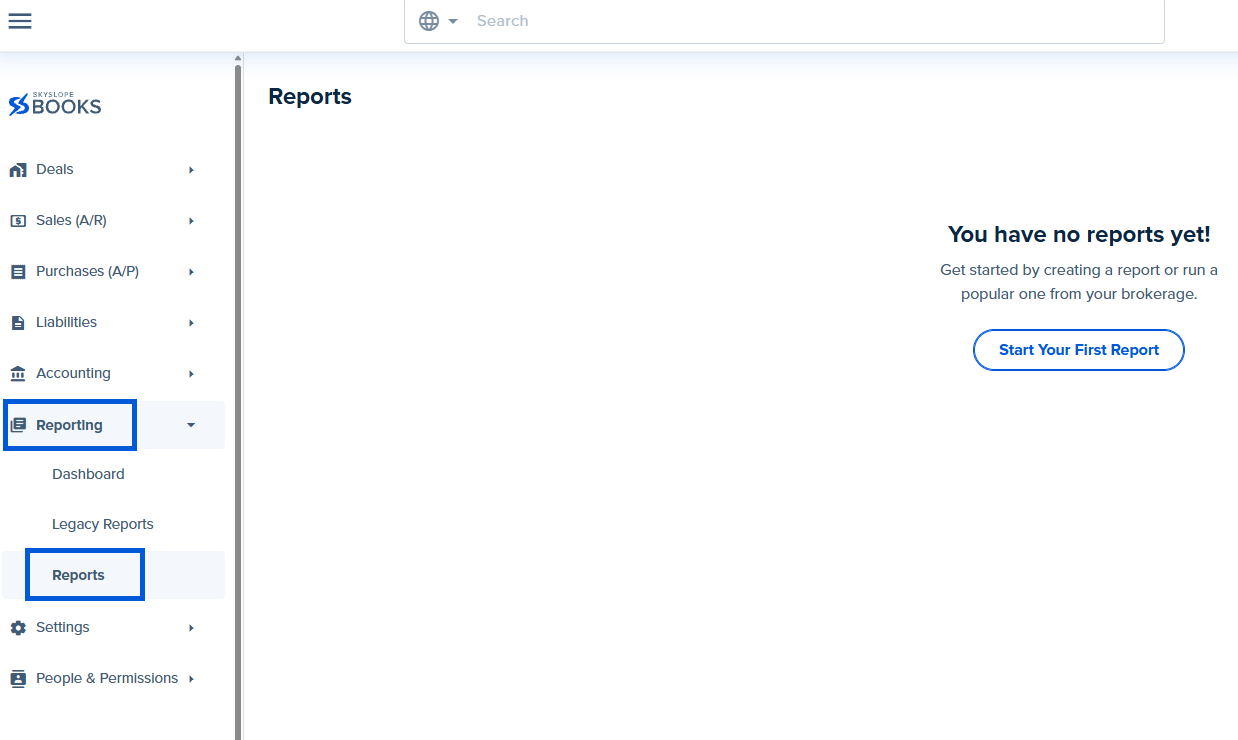
To access the Agent Cap Progress Report, click on the three lines at the top left-hand corner of the screen.
Next, click on Reporting and then Reports:
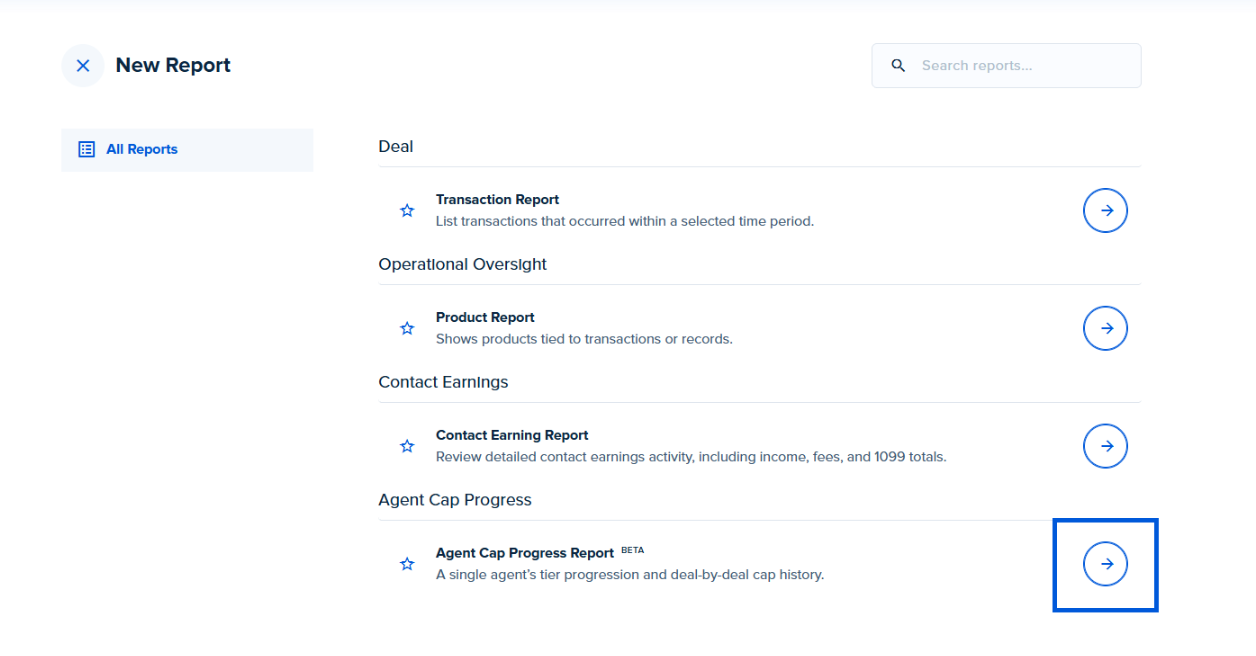
Select Create Report, then select Agent Cap Progress Report:
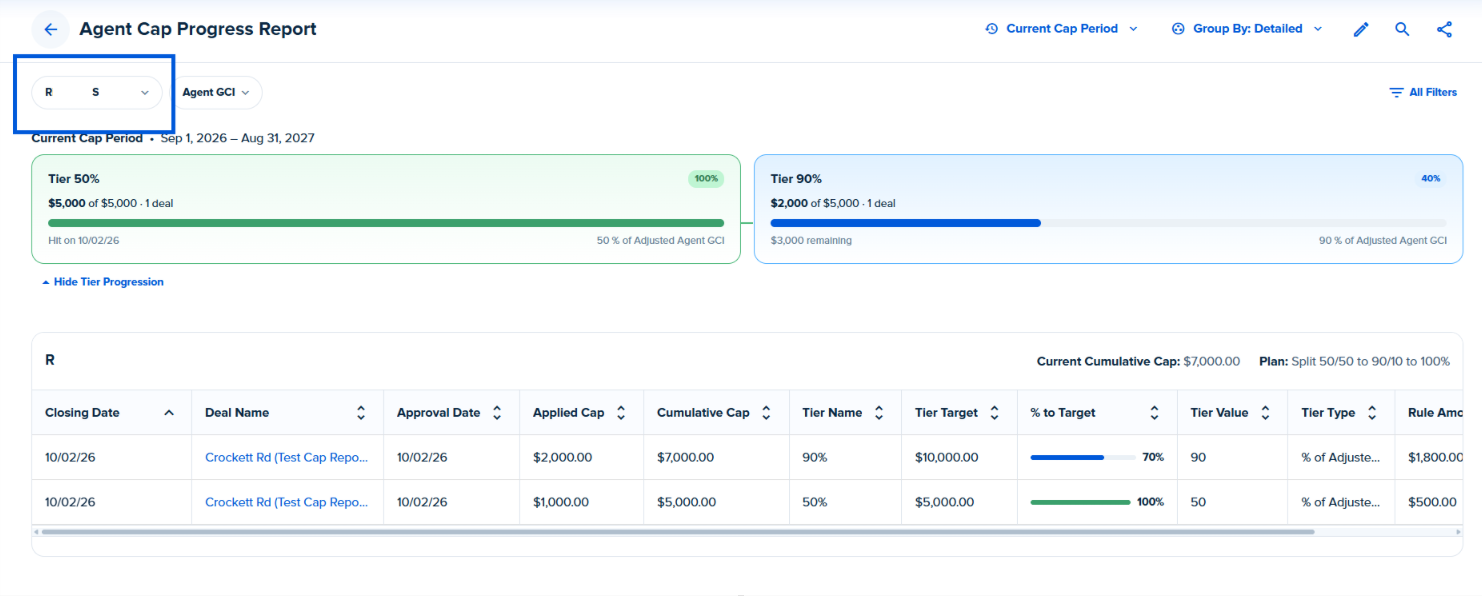
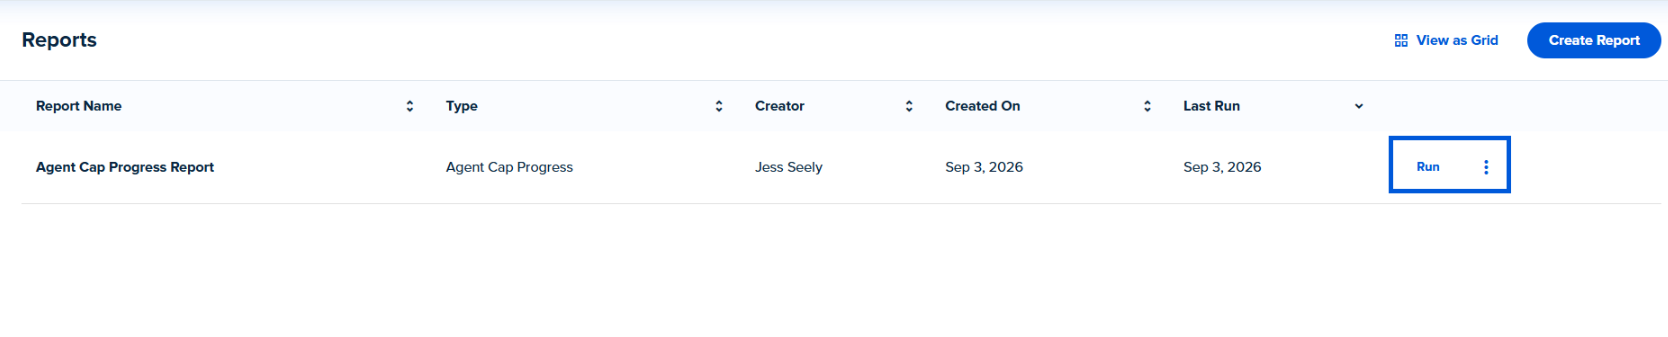
After clicking Run, this is where you can customize your report.
To select an agent, click on the Agent dropdown on the top left corner of the screen. You can either search for the agent’s name or scroll through the list and select the appropriate agent:
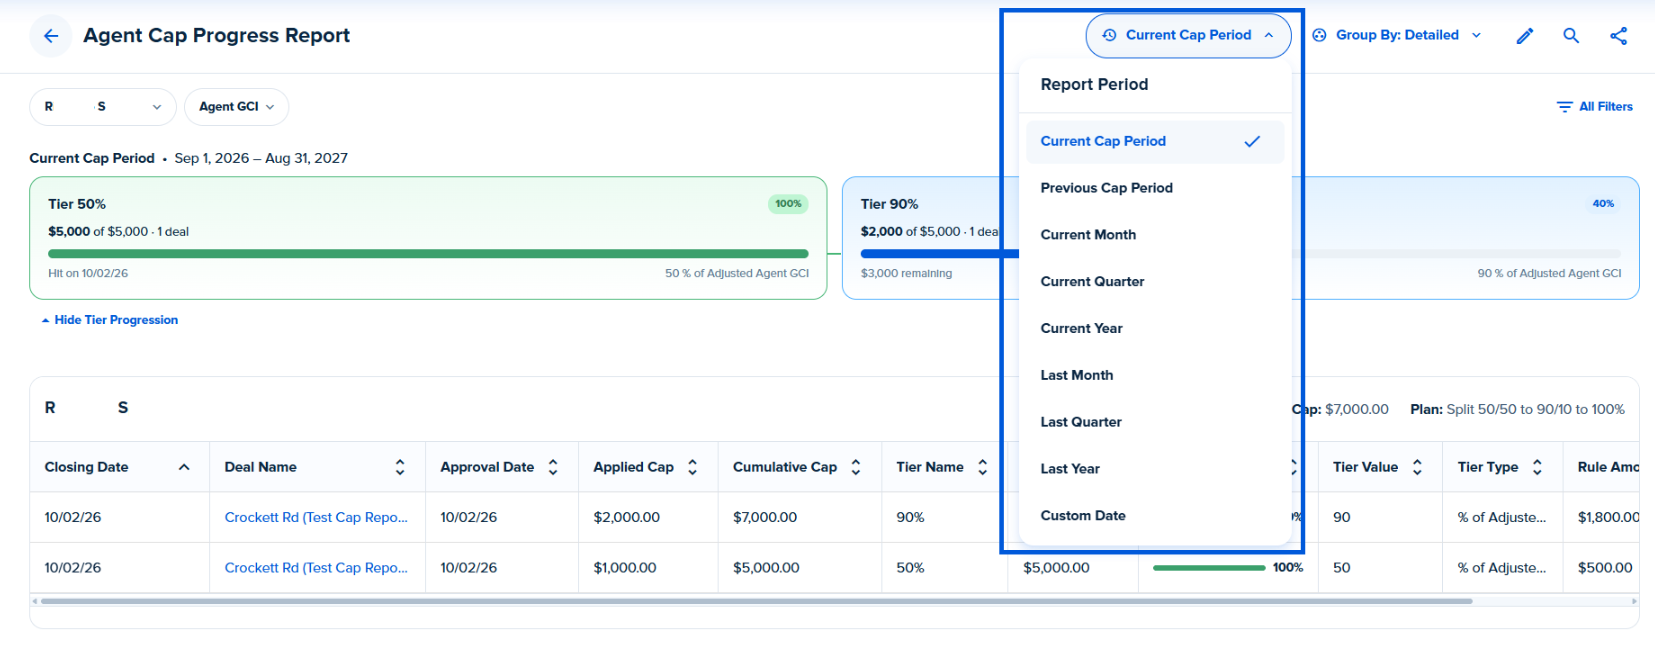
The Report Period dropdown makes it easy to confirm you are reviewing the correct cap timeframe. If your selected date range covers multiple cap periods you can use the cap period dropdown to move between periods without rerunning the report.
When reviewing a previous cap period, the tier cards use a muted grey appearance to indicate that you’re viewing historical progress.
Please note that the results for the report are based on the Closing Date of the Deal.
On the right-hand side of the screen, clicking on the All Filters will allow you to narrow down the report by:
Agent
Condition Type
Commission Plan
Element Name
Tier Name
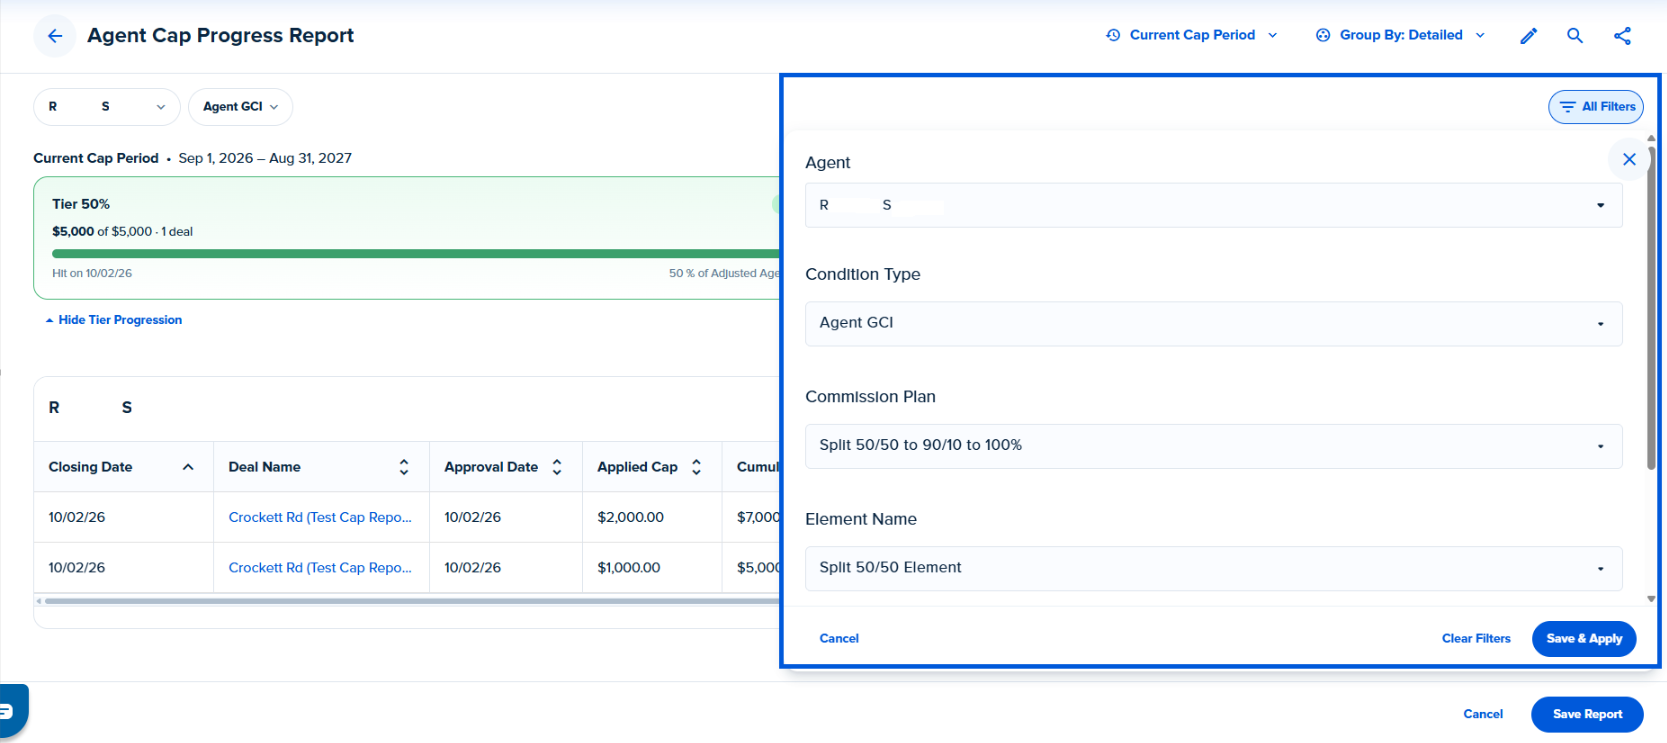
Once you have customized the information you would like on the report, click Save and Apply located in the bottom right corner.
One of the key features of the Agent Cap Progress Report is the Tier Progression section.
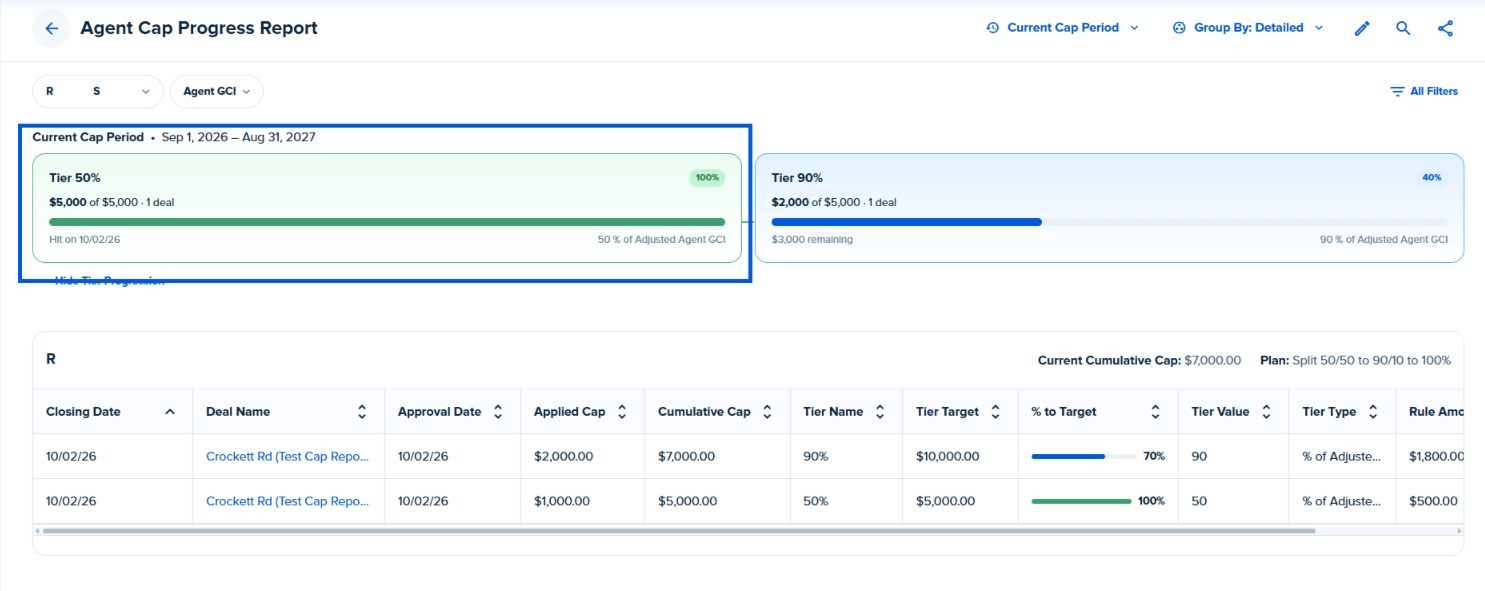
Each commission tier is displayed as a card that shows the agents progress toward that tier, including the applicable commission split.
Completed Tiers will appear in green and display a completion indicator above 100%.
You’ll see:
The amount accumulated toward the tier
The tier target
The number of deals that contributed to the tier
The date the tier was reached
The commission split for that tier
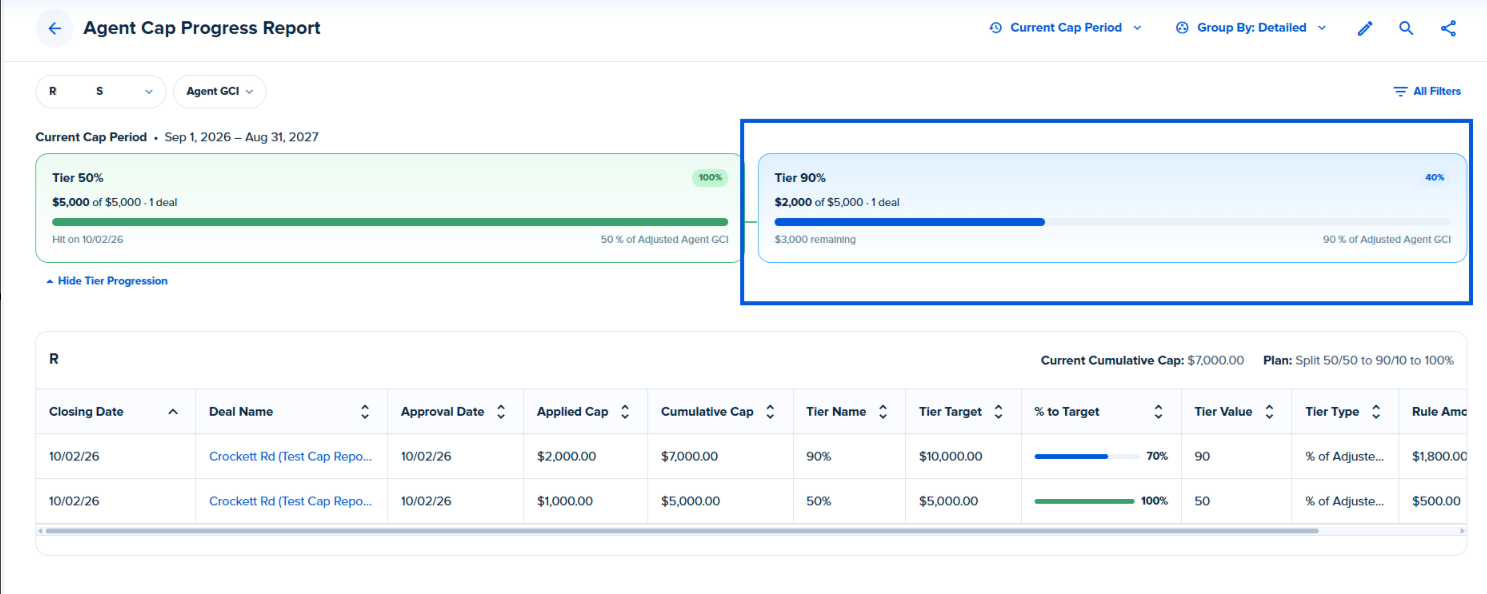
Current Tiers are tiers the agent is currently working toward and will appear in blue and you will see:
The current progress percentage
The amount accumulated
The tier target
The number of contributing deals
The amount remaining to reach the tier
The commission split for the tier
Upcoming Tiers are tiers the agent has not reached yet and will appear greyed out and will be marked as Locked. These cards will show:
The future tier target
The commission split associated with the tier
Which previous tier must be completed before it becomes available
Together, the tier cards give an easy-to-follow view of an agent's journey. From completed tiers, to their current progress, to what comes next.
Note: For rolling caps, the report automatically calculates the appropriate cap window based on the selected end date. This allows you to quickly review the agent's progress within each applicable rolling period.
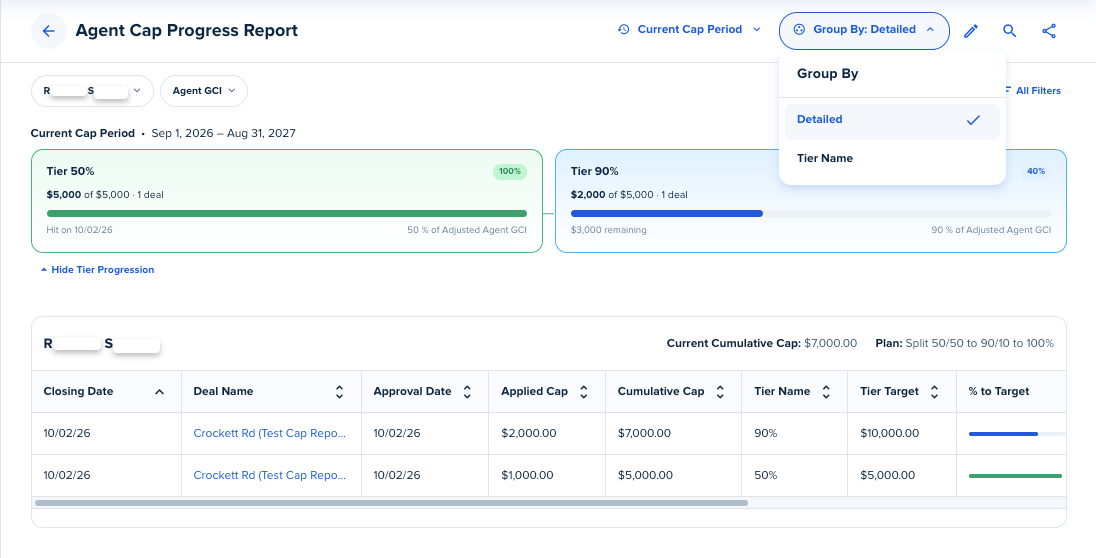
The Group By dropdown allows for different viewing options within the report:
Detailed - Displays each deal in the report within one simplified table
Tier Name - Organizes the data based on the commission plan’s tiers
The final customization option allows you to choose which columns will appear on the report. To customize the columns, click on the pencil icon on the right-hand side of the screen:
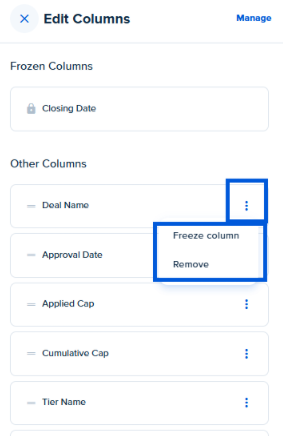
Once you are in the Edit Columns module, you can click and drag the cells vertically to change their order. You can also click the three dots to the right of each cell to freeze the position of the cell or remove it from the report.
You can click on Manage in the top right-hand corner to add/remove different fields within the report through the checkbox selection. After any changes, click Done to save them and return to the Edit Columns sidebar.
Once the columns are selected and in the order you would like, click Apply Changes at the bottom of the dropdown menu.
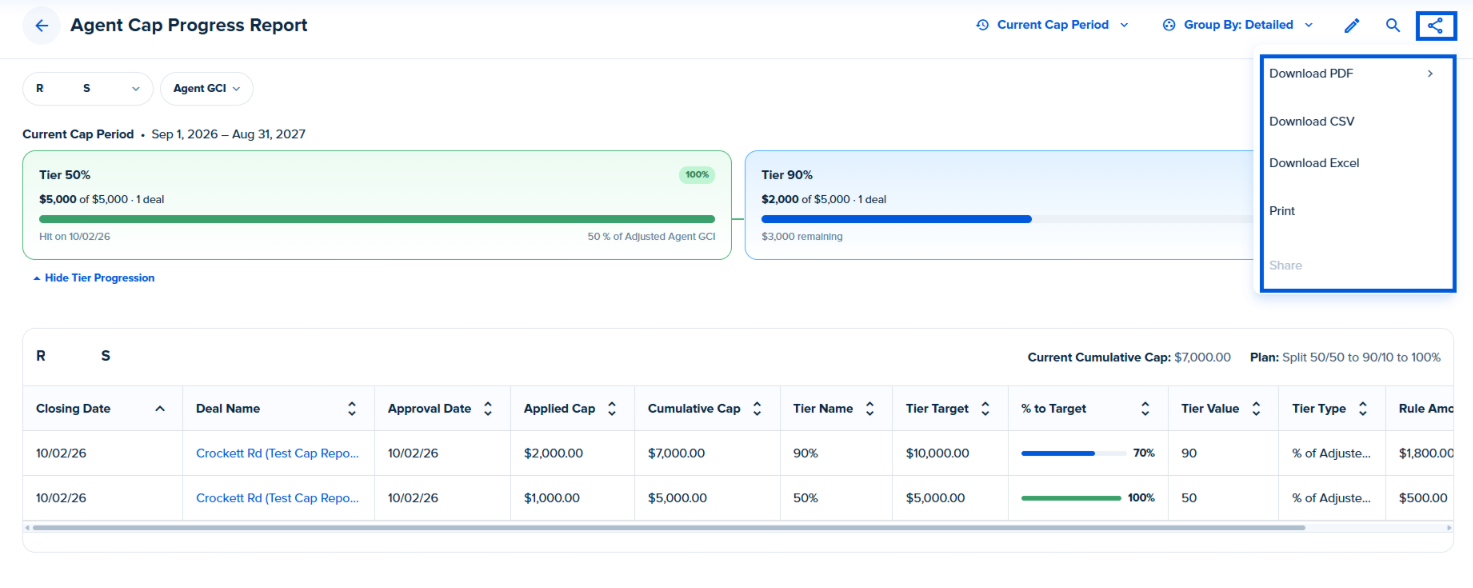
To share the report, click the toggle on the right-hand side of the page. You will then have access to download, print and share the report:
Once you have completed all customizations, click on Save Report on the bottom right-hand side of the screen.
You will then be able to give the report a custom name. Once saved, you will have access to run the report in the future with the same customizations, making it easy to access the information you need.
Was this article helpful?
That’s Great!
Thank you for your feedback
Sorry! We couldn't be helpful
Thank you for your feedback
Feedback sent
We appreciate your effort and will try to fix the article
<\br>