Transaction reports provide an easy way to review both high-level summaries and detailed insights into your organization’s performance. With the new Books’ Transaction Report, you can create customized reports tailored to your specific business needs, allowing you to analyze transactions from multiple perspectives.
Transaction reports created within your personal SkySlope Books account are private and visible only to you. Each user can create and manage their own set of transaction reports independently.
1. In the left navigation menu, go to Reporting, then select Reports.
2. Click the Create Report button at the top right of your screen.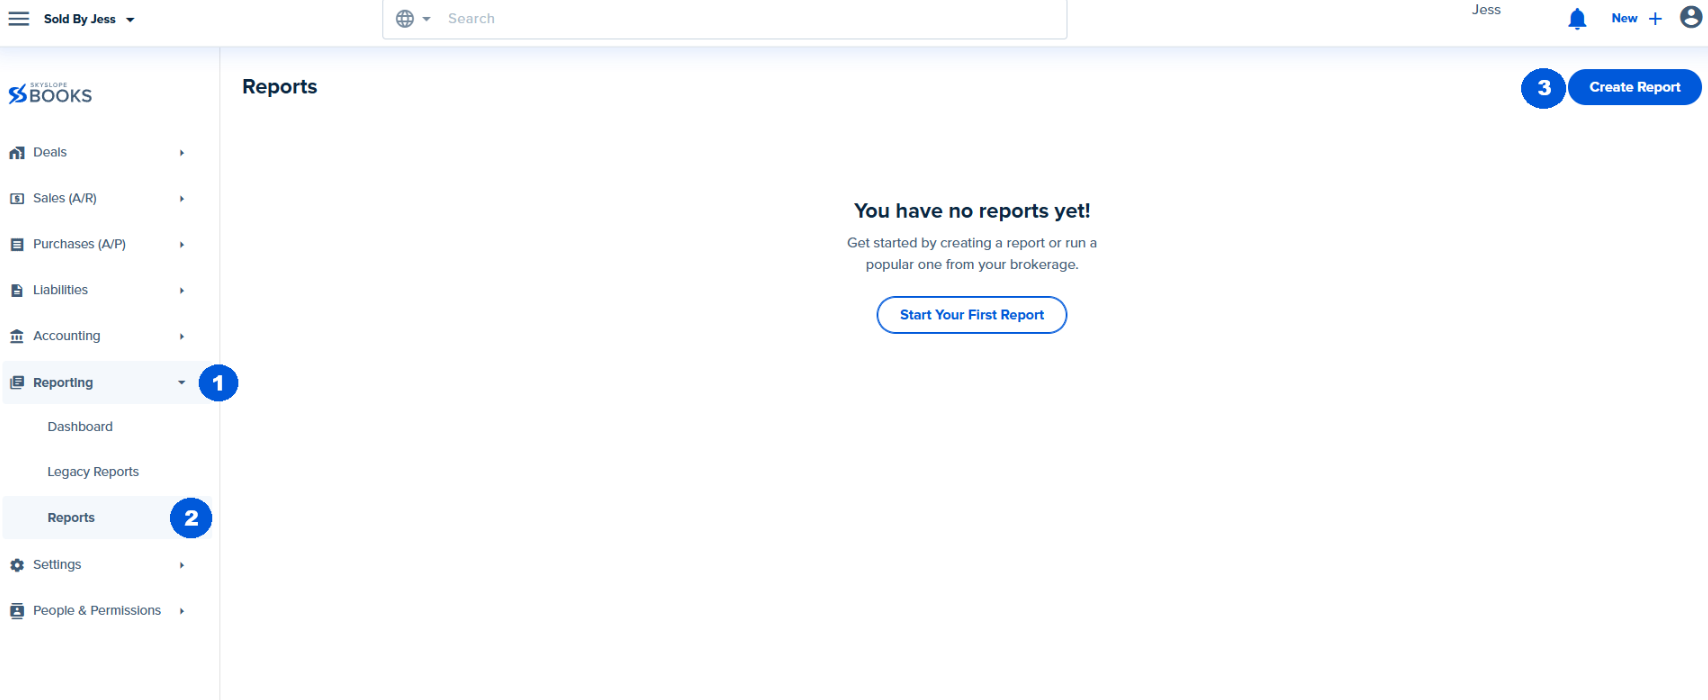
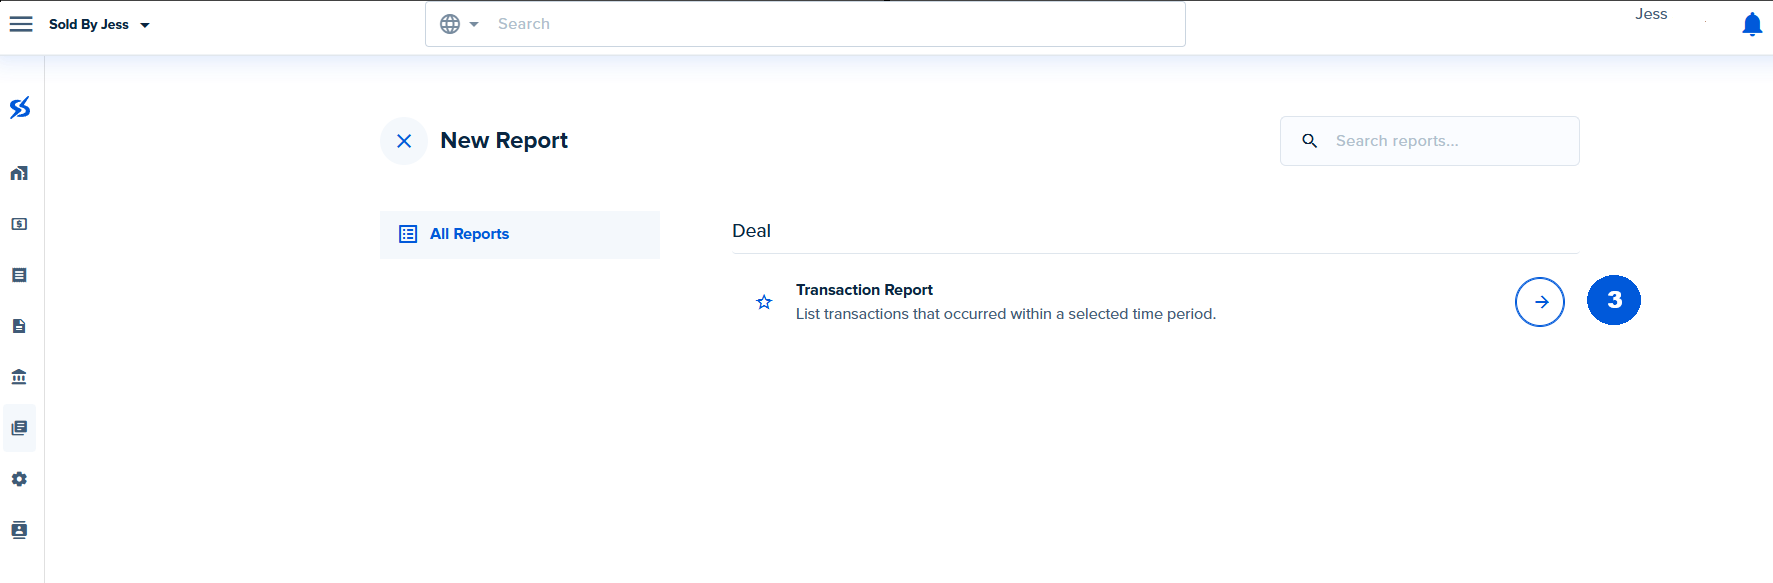
3. Next, select the arrow to the right of Transaction Report and click Run.
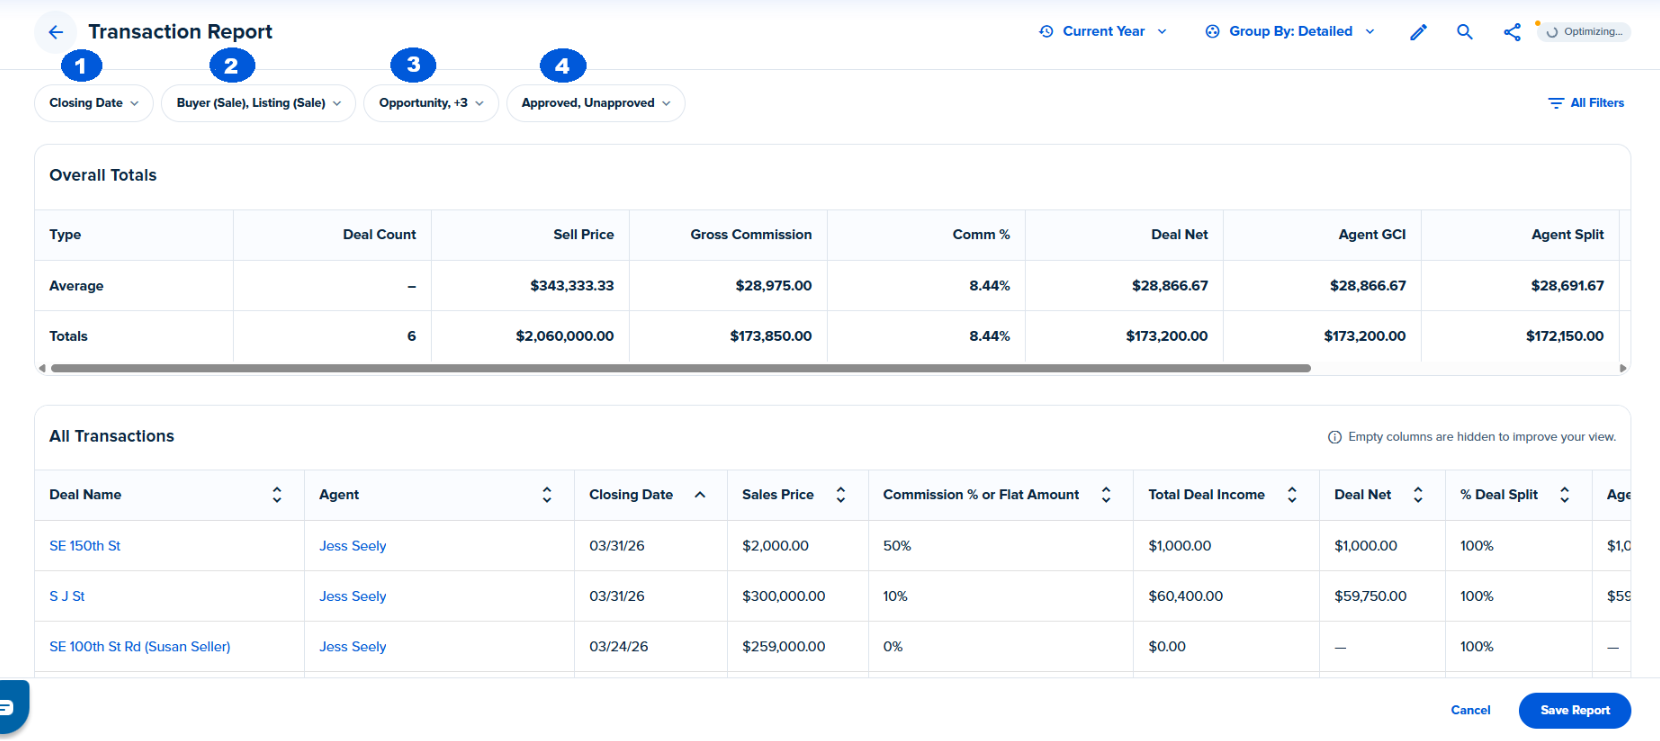
On the next page, there are many ways to customize your report! At the top of the screen you can filter and choose from the following options with the respective dropdowns:
Run By - What date within the Deal the report is based on.
Deal Type - What type of Deals you would like in the report.
Deal Status - What Deal statuses you would like to include in the report.
Deal Approval Status - Whether you want approved or unapproved deals or both included in the report.
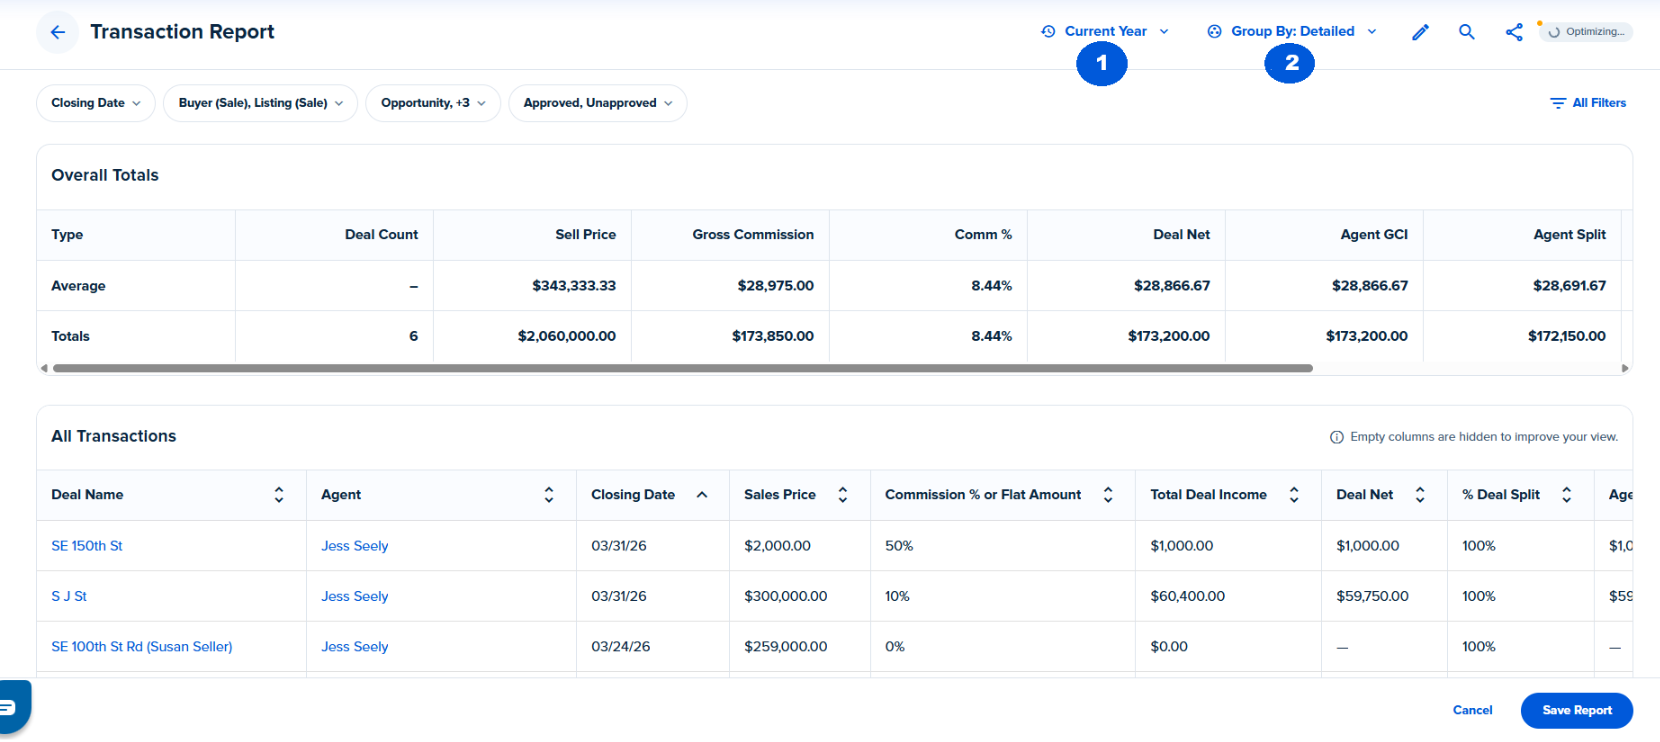
On the top right side of the screen, there are more filtering options:
Report Period - Choose the time frame for the data on the report.
Group By - How you would like the report grouped.
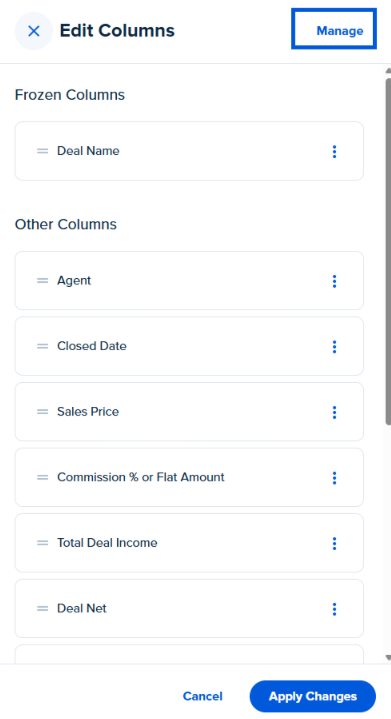
By clicking on the pencil icon, you can edit what columns will show up on the report and even what order they are in! 
Once you are in the Edit Columns module, you can click and drag the cells vertically to change their order. You can also click the three dots to the right of each cell to freeze the position of the cell or remove it from the report.
You can click on Manage in the top right-hand corner to add/remove different fields within the report through the checkbox selection. After any changes, click Done to save them and return to the Edit Columns sidebar.
Once the columns are selected and in the order you would like, click Apply Changes at the bottom of the dropdown menu.
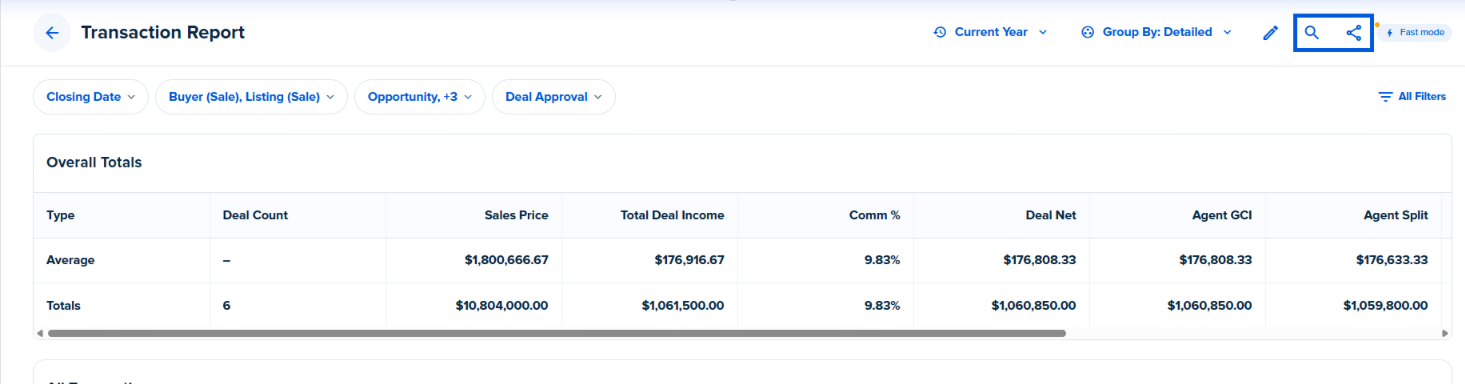
On the main transaction report page, on the top right hand corner of the screen, there is a search feature as well as a toggle where you can download, print and share the report:
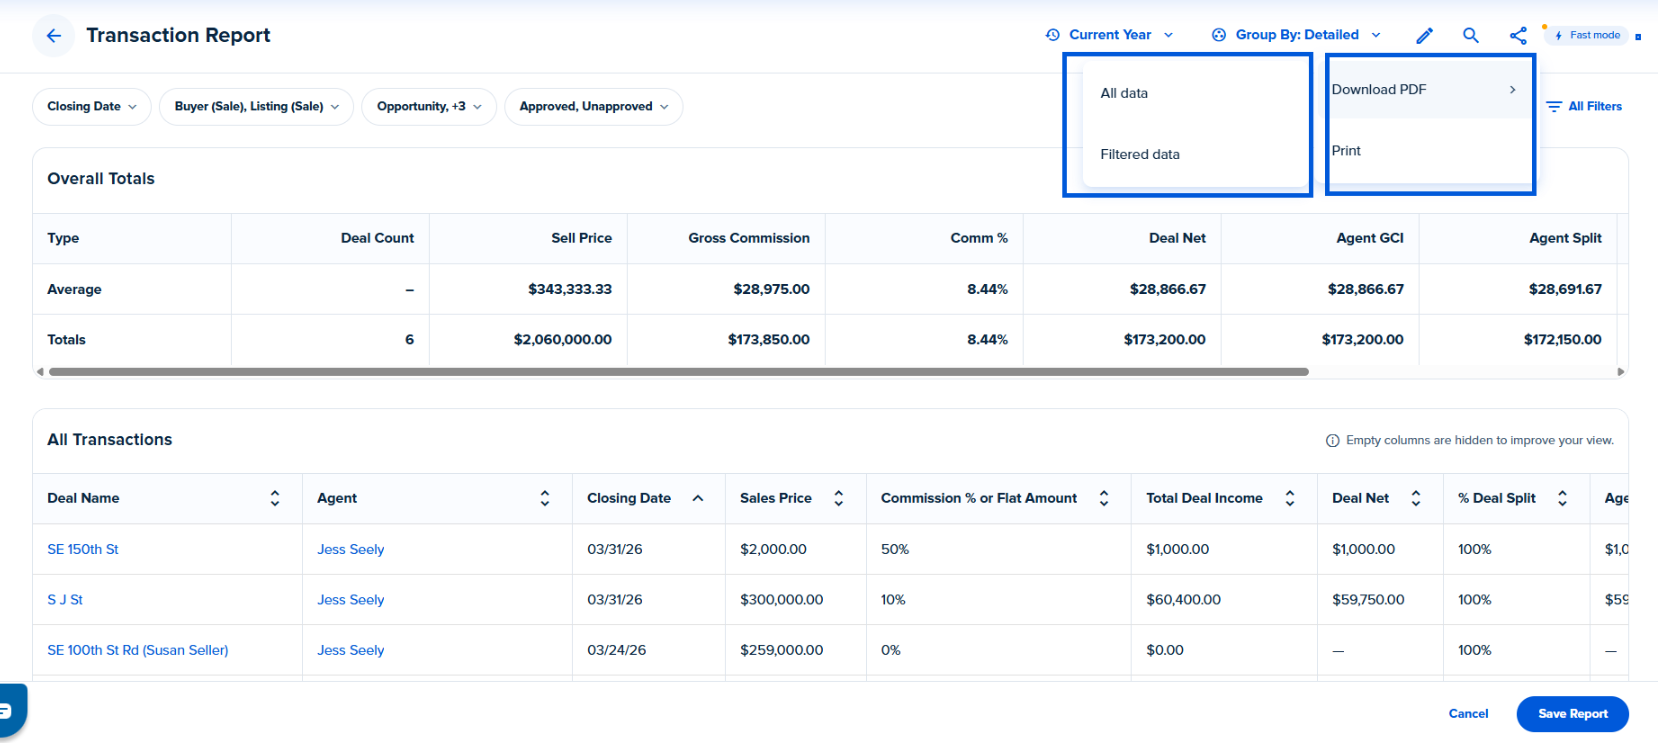
When downloading the report, you can choose to download All data or the Filtered data.
All data - The downloaded report will reflect all columns (even unselected ones from the Edit Columns > Manage menu).
Filtered data - The downloaded report will reflect only selected columns.
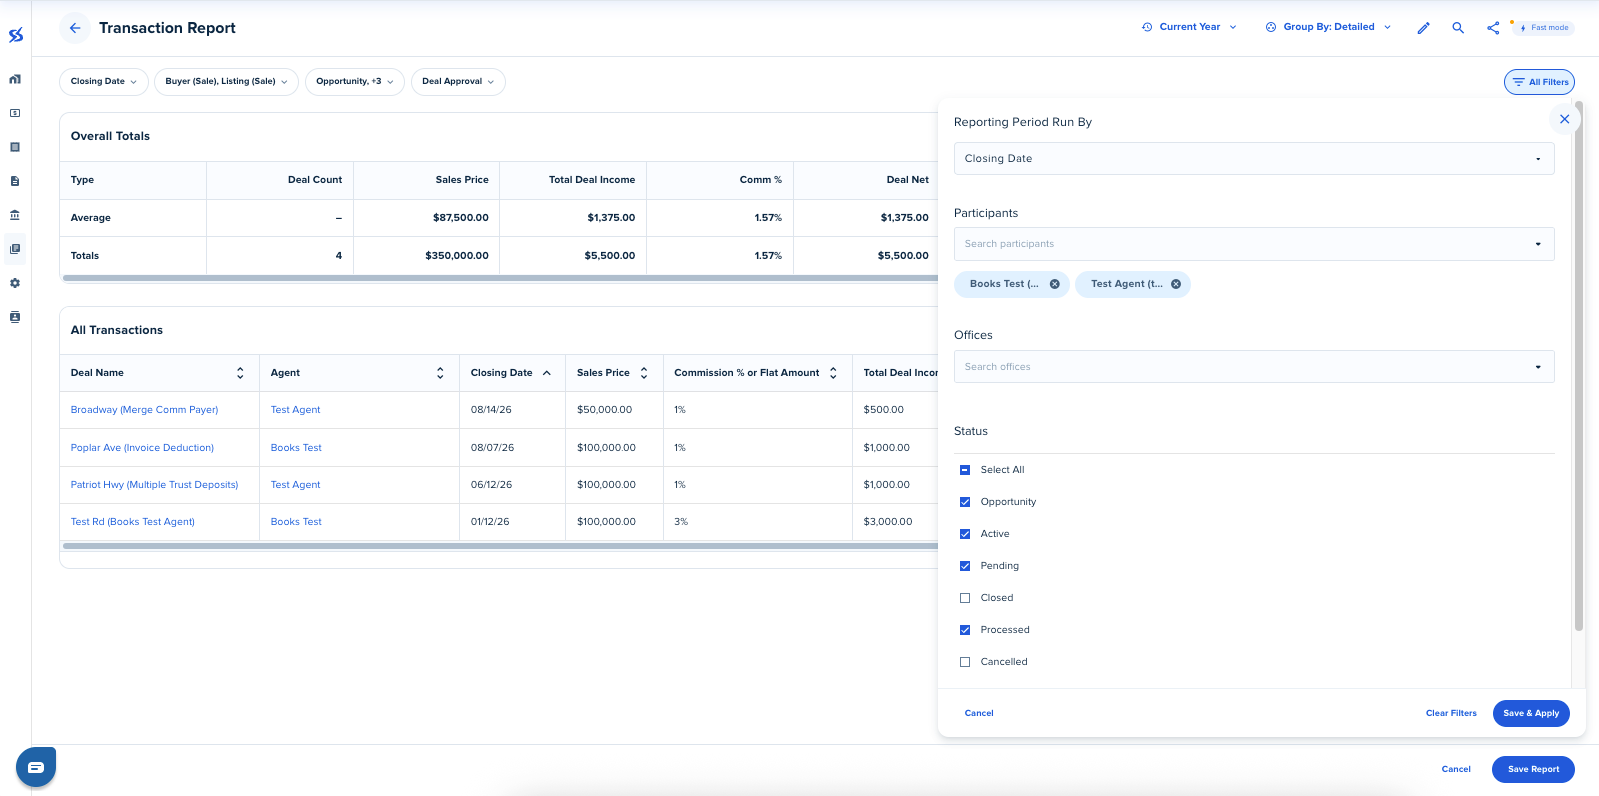
Additionally, there is the All Filters option on the right-hand side of the screen. Here you can edit the filters noted above (Run By, Type, Status, Approval Status), but also filter based on Participants, Offices, Property Class, Source of Business, and Deal Tags. After tailoring the report parameters to your preference, select Save and Apply:
4. Once all customizations have been completed, click Save Report on the bottom right-hand corner of the screen. You will then be able to give the report a custom name.
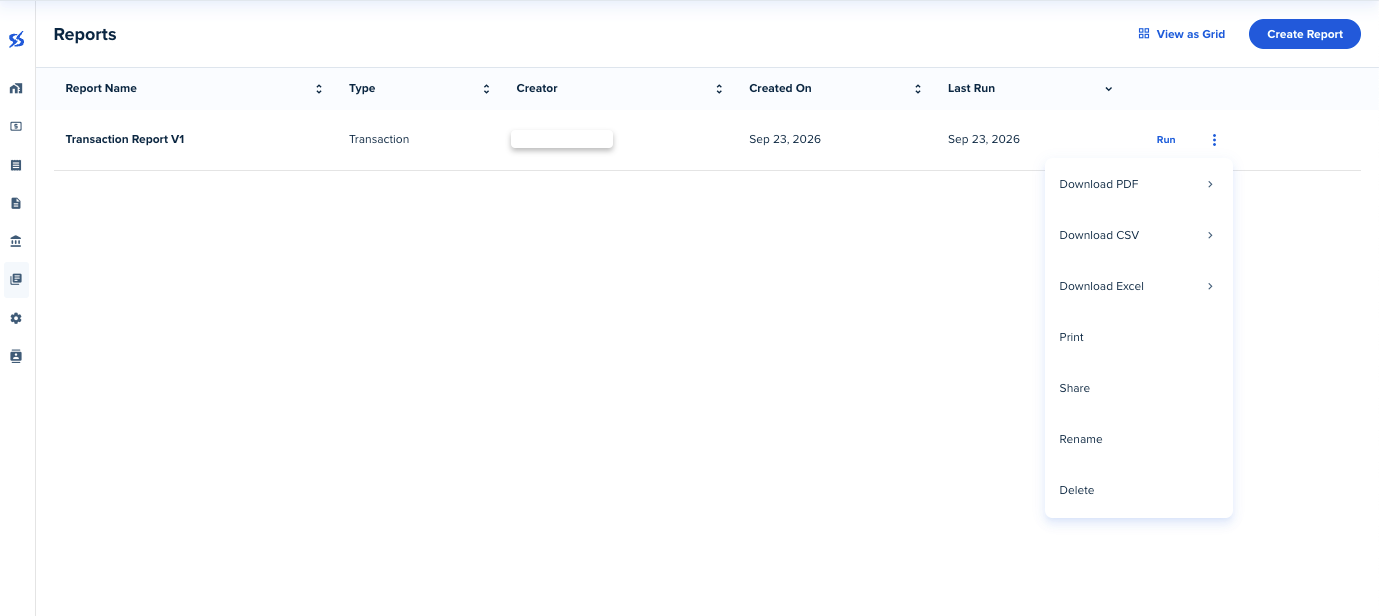
Once saved, you will have access to run the report in the future with the same customizations, making it easy to access the information you need. Also, selecting the three dots will allow you to download, print, share, rename, or delete the report.
Was this article helpful?
That’s Great!
Thank you for your feedback
Sorry! We couldn't be helpful
Thank you for your feedback
Feedback sent
We appreciate your effort and will try to fix the article
<\br>