Recurring Journals are journal entries with the same details you post on a regular schedule. Pick how often the entry should post and how long it should keep repeating, and Books creates each new entry for you. Set them up once and they automatically create the same journal entry at a set frequency for a set time period.
To create a Recurring Journal, begin by going to the Accounting > Journals menu option within Books. On the Journals page, select the Recurring tab and click on the + Create Recurring Journal button.

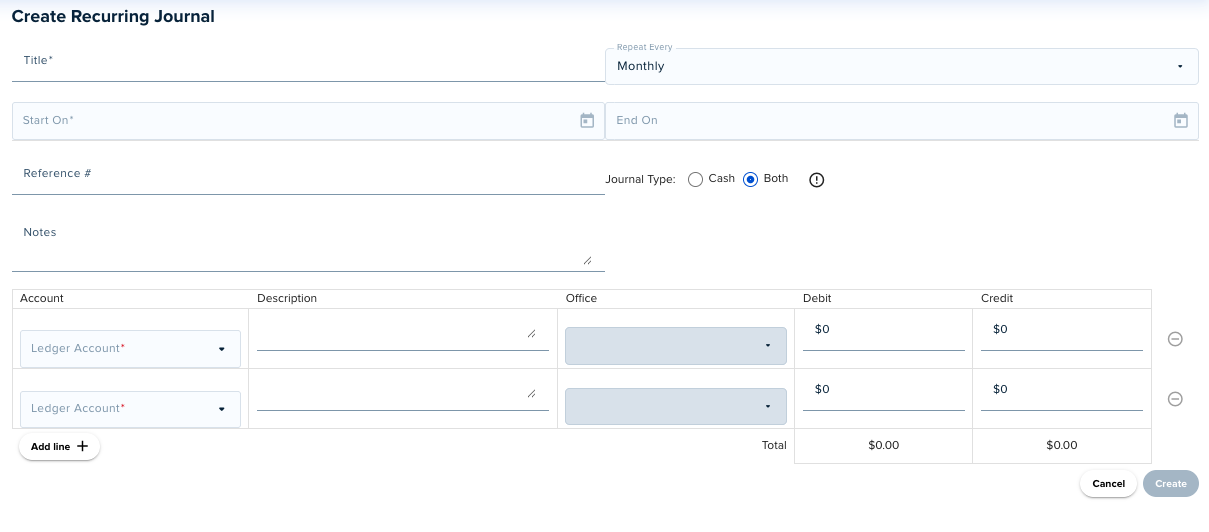
When creating a Recurring Journal, you will have similar fields as when you are creating a one-time Journal entry with some additional fields to determine the periodic parameters of the journal entry postings. The following fields will appear:
- Title (required) - Enter a name for the recurring journal entry.
- Repeat Every (required) - Select the time frequency of the recurring journal entry.
- Start On (required) - Select the date for when the recurring journal entry begins.
- End On (required) - Select the date for when the recurring journal entry is done.
- Reference # (optional) - For internal brokerage notes as needed (e.g. coding notes, check numbers, deal addresses etc.).
- Journal Type (required) - Choose the "Cash" option to make this journal entry appear only in the reports that are generated on cash basis. If not, select "Both" to make it appear in both the accrual and cash basis reports.
- Notes (optional) - Enter any specific details.
- Ledger Accounts (required) - Select the accounts that are involved in this recurring journal entry.
- Description (optional) - Another field for internal brokerage notes as needed.
- Office (optional) - Can be used to specify that the recurring journal entry should be recorded under a particular Office's financial reports.
- Debit Amount (required)
- Credit amount (required)
- Add line + (as needed) - If more than two ledger accounts are involved in a particular journal entry, you can use this feature to add an additional ledger account line item.
After filling in the fields and the debits/credits balance, you can click the Create button to finish the setup of the recurring journal entry.
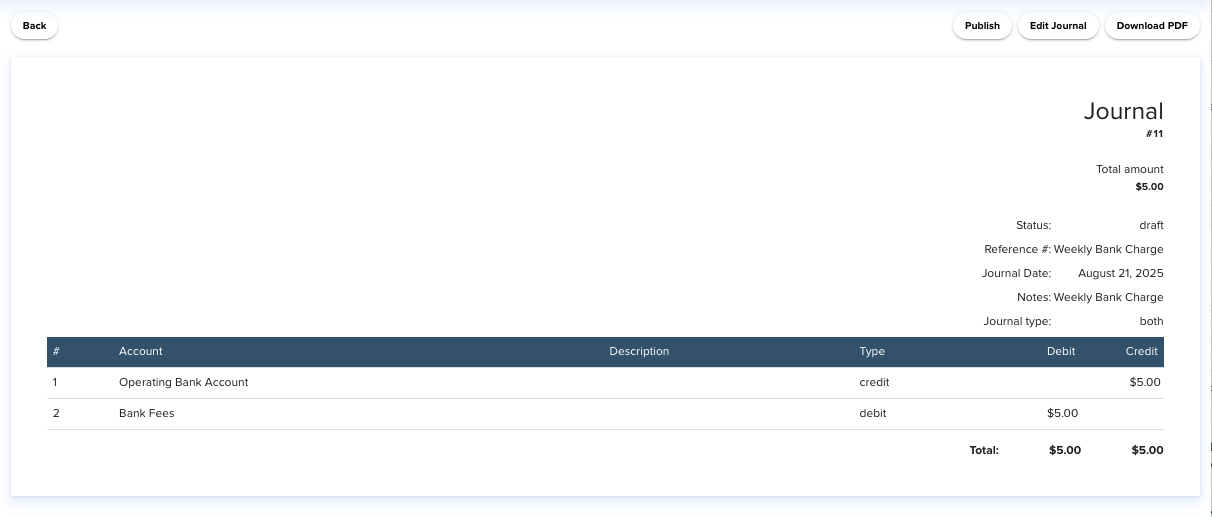
Once the Recurring Journal is set up, it'll post the initial journal entry based on the Start On date chosen, then subsequent journal entries will post based on the time frequency selected within the Repeat Every field. At any time, you can select the Recurring Journal and edit it under the Recurring tab.
Important Note: Setting up a Recurring Journal will post journal entries with the Draft status. You will need to select the Draft journal entry under the Entries tab and click on Publish to post the accounting entries that impact the ledger accounts.
Journal Templates are reusable journal entries with the ledger accounts, amounts, and other details already filled in, so you don't have to rebuild the same posting each time.
To create a Journal Template, begin by going to the Accounting > Journals menu option within Books. On the Journals page, select the Templates tab and click on the + Create Template button.

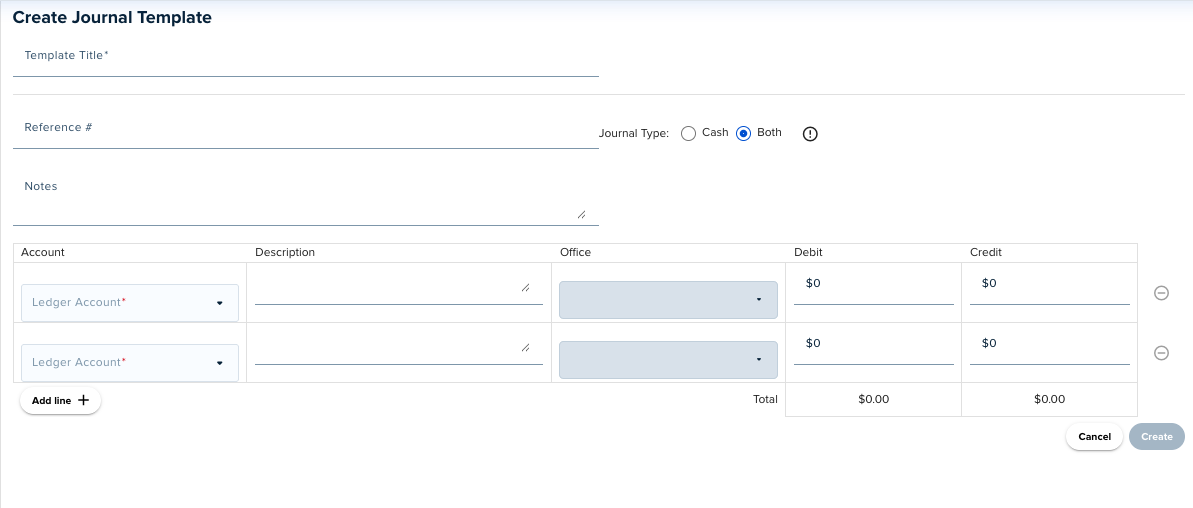
When creating a Journal Template, you will have similar fields as when you are creating a one-time Journal entry. The following fields will appear:
- Template Title (required) - Enter a name for the journal template.
- Reference # (optional) - For internal brokerage notes as needed (e.g. coding notes, check numbers, deal addresses etc.).
- Journal Type (required) - Choose the "Cash" option to make this journal entry appear only in the reports that are generated on cash basis. If not, select "Both" to make it appear in both the accrual and cash basis reports.
- Notes (optional) - Enter any specific details.
- Ledger Accounts (required) - Select the accounts that are involved in this journal template.
- Description (optional) - Another field for internal brokerage notes as needed.
- Office (optional) - Can be used to specify that the journal entry should be recorded under a particular Office's financial reports.
- Debit Amount (required)
- Credit amount (required)
- Add line + (as needed) - If more than two ledger accounts are involved in a particular journal entry, you can use this feature to add an additional ledger account line item.
After filling in the fields and the debits/credits balance, you can click the Create button to finish the setup of the journal template.
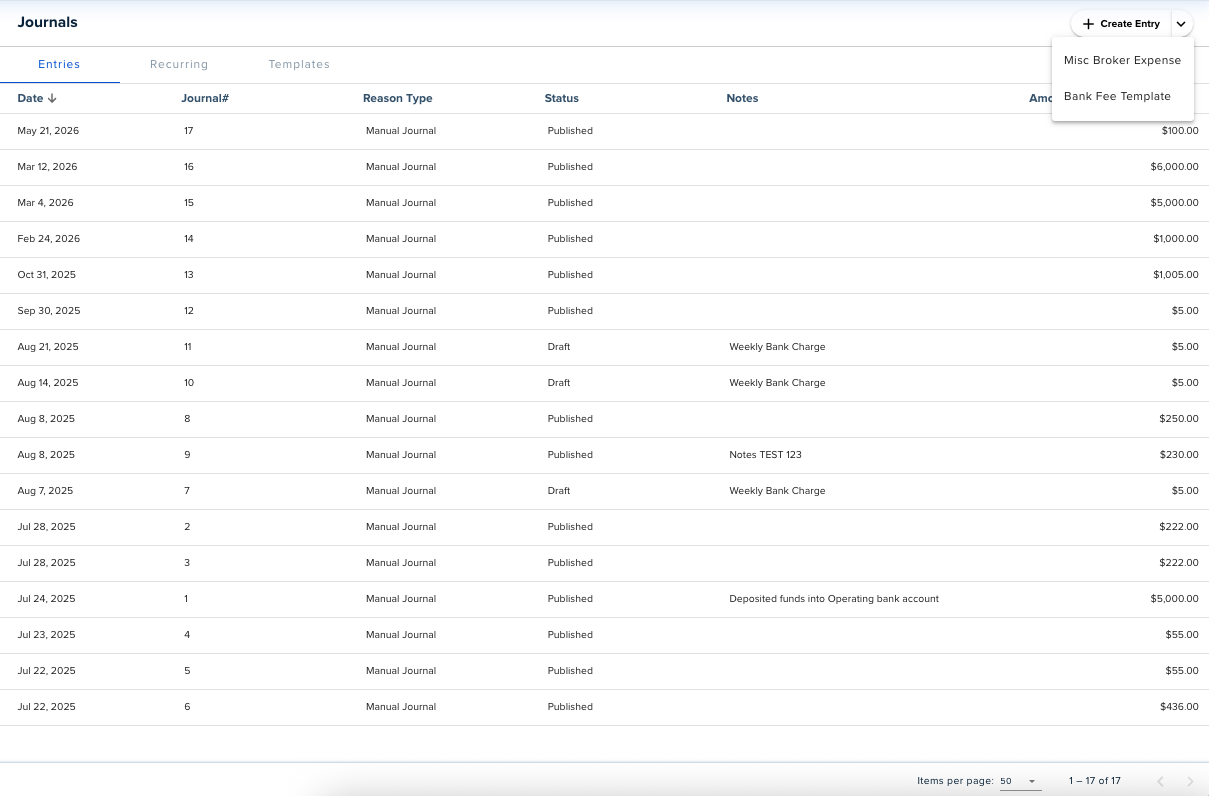
Once the Journal Template is set up, you can use the template under the Entries tab through the dropdown option beside the + Create Entry button. At any time, you can select the Journal Template and edit it under the Template tab.
Was this article helpful?
That’s Great!
Thank you for your feedback
Sorry! We couldn't be helpful
Thank you for your feedback
Feedback sent
We appreciate your effort and will try to fix the article
<\br>