In this article, we will look at:
Viewing Payments Made
1. In the left menu, navigate to Purchases (A/P). Then go to the Payments Made section. This takes you to the Payments Made page.

2. On the Payments Made page, for each payment, you can view:
- Payment Date
- Vendor
- Payment #
- Reference #
- Check #
- Payment Mode
- Status
- Applied
- Total Applied
- Actions
3. Click on any payment made to open it and view its details:

4. On this page, you have the following options:
- Edit Payment
- View History
- View any related Bills
- View More Information
Filtering Payments Made
You can filter your payments made based on status.
1. Go to the Status filter dropdown at the top right of your screen.
2. Choose the statuses from the dropdown.
3. The payments made displayed will update based on the chosen status.

Sorting Payments Made
You can sort your payments made in ascending or descending order based on:
- Payment Date
- Vendor
- Payment #
- Reference #
- Check #
- Payment Mode
- Status
- Applied
- Total Applied
You can do that by clicking the arrow next to each header's name, as shown below.

Creating Payments Made
1. In the left menu, navigate to Purchases (A/P). Then go to the Payments Made section. This takes you to the Payments Made page.
2. Click the Create button in the upper right corner.

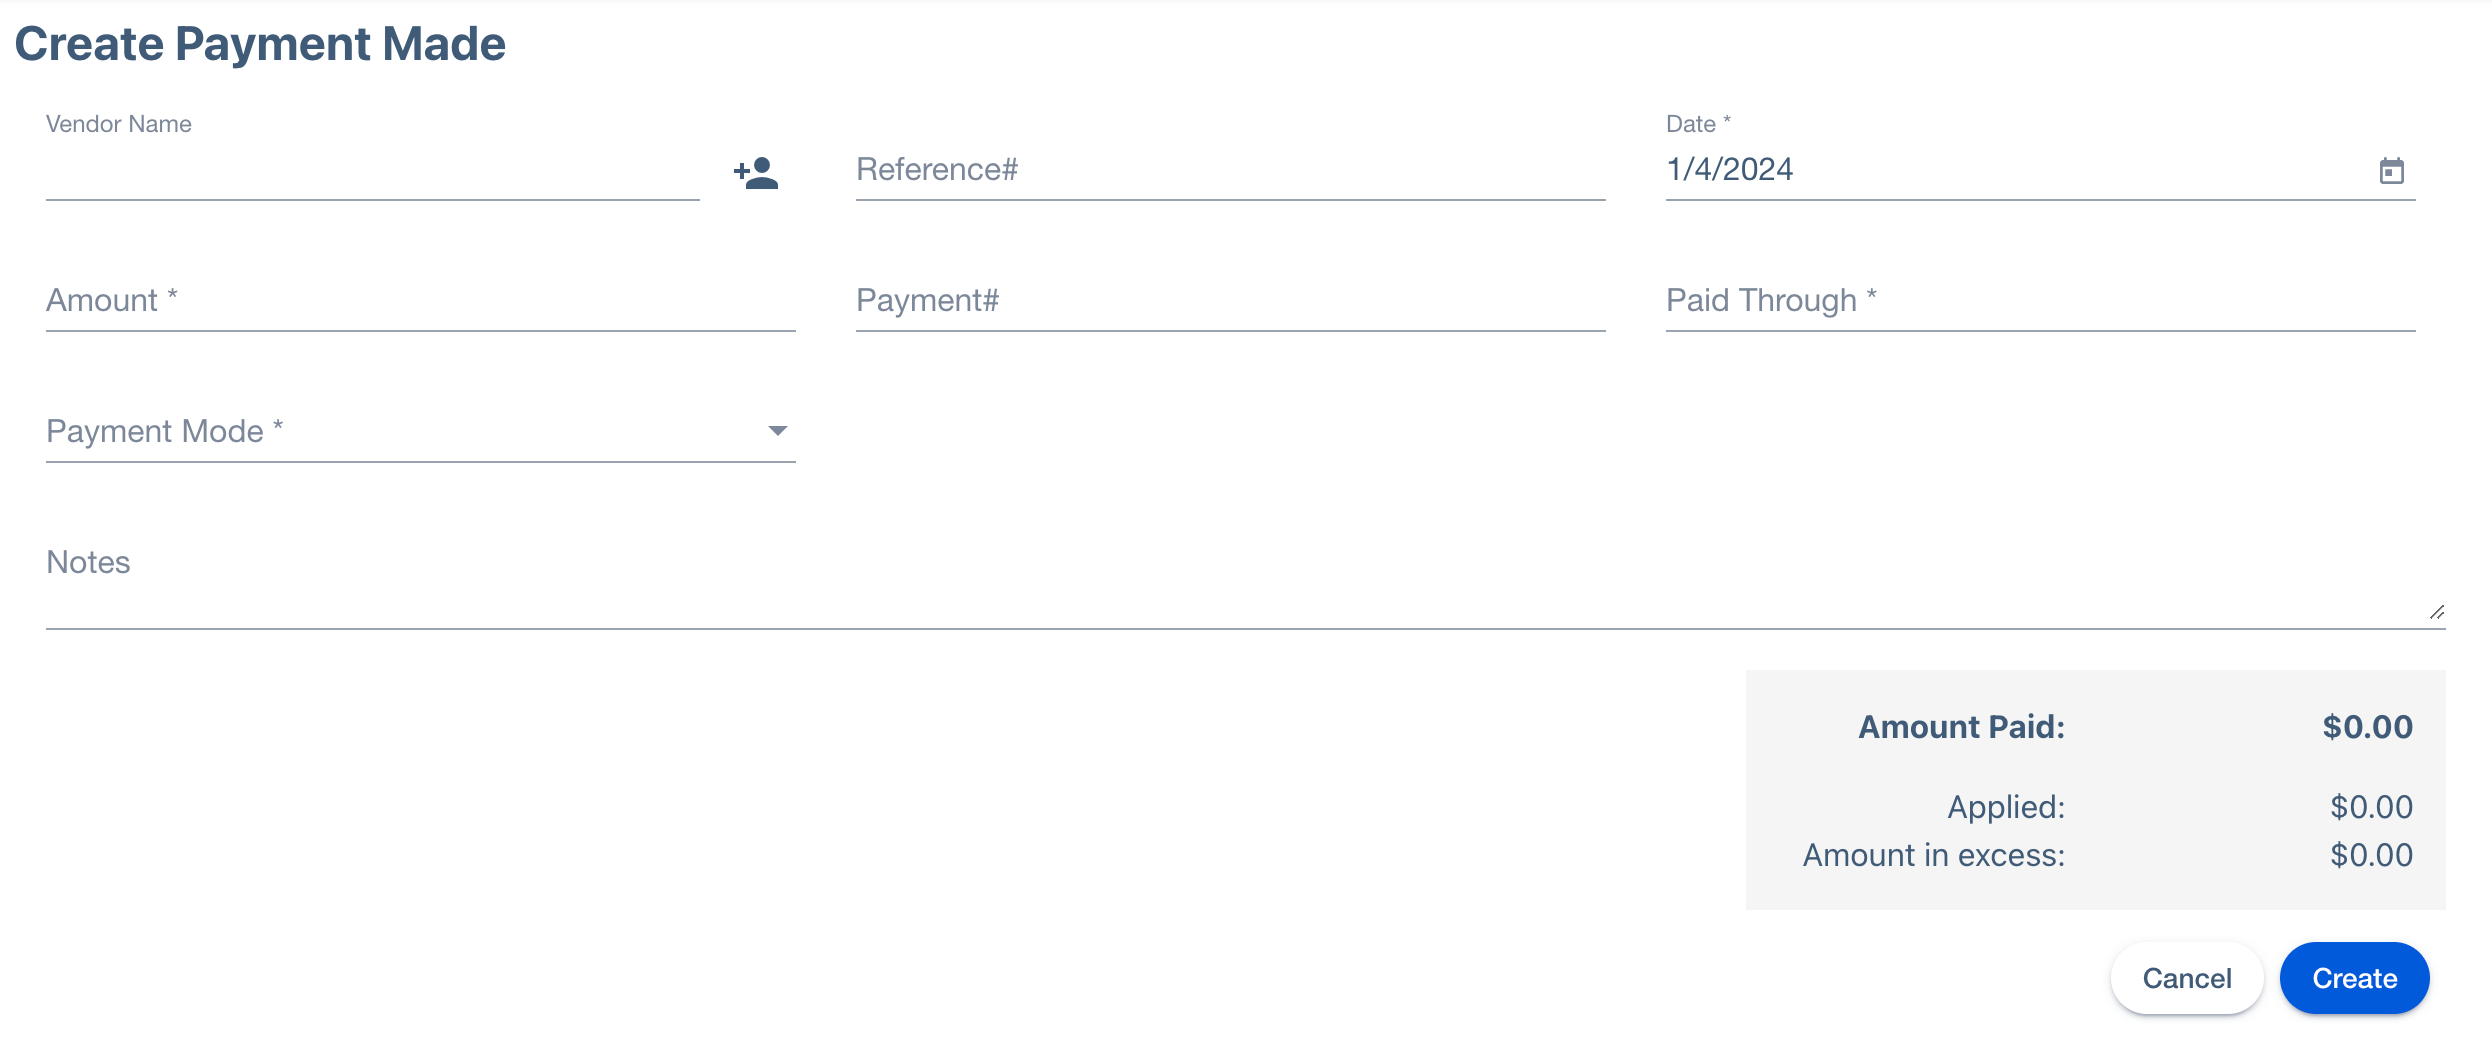
3. This takes you to the Create Payment Made page.

4. You will be asked to enter the following:
- Vendor Name: When you enter the vendor name, you will see all unpaid bill for that vendor
- Reference
- Date
- Amount: The amount you want to pay the vendor, it can be applied to multiple bills
- Payment #
- Paid Through: The bank account
- Payment Mode
- Notes
5. Once you've provided all of the required information, click Create.
Editing Payments Made
1. Click the overflow menu in Actions. Then select Edit.

2. This opens the Edit Payment Received page.

3. You can make changes to any details, except Payment Mode.
4. Once you have made your changes, click Save.
Deleting Payments Made
1. Click the check box next to a payment made. You can select multiple at a time. Then click Delete.

Note: If the payment is related to an invoice or journal that has a matched or reconciled transaction, it will not be deleted. You will first remove the payments from the Payment Received, the un-match and un-reconcile the related transaction.
3. On successfully deleting a payment made, you will see a success message.
Was this article helpful?
That’s Great!
Thank you for your feedback
Sorry! We couldn't be helpful
Thank you for your feedback
Feedback sent
We appreciate your effort and will try to fix the article