Roles define which permission User Profiles have in the broker account. Permissions only need to be assigned if the user will be logging into SkySlope Books. When creating User Profiles, one or more roles can be assigned.
In this article, we will go over:
Default Roles
There are two default roles that can be assigned to User Profiles that are not visible in the Roles screen.
Company Admin: Full access to Books
Agent: Limited access - Can view their own deals, add banking information to receive EFT payments, does not have reporting access
The Roles Page
The roles page allows you to roles in addition to the default roles. This allows you to provide additional permissions to agents, or create additional roles for admin to limit access based on job responsibility.
Accessing the Roles Page
1. To access the Roles page, go to the left menu.
2. Navigate to Settings, then hover your cursor over Company.
3. An overflow menu will appear. Select Roles.

Role Page Breakdown
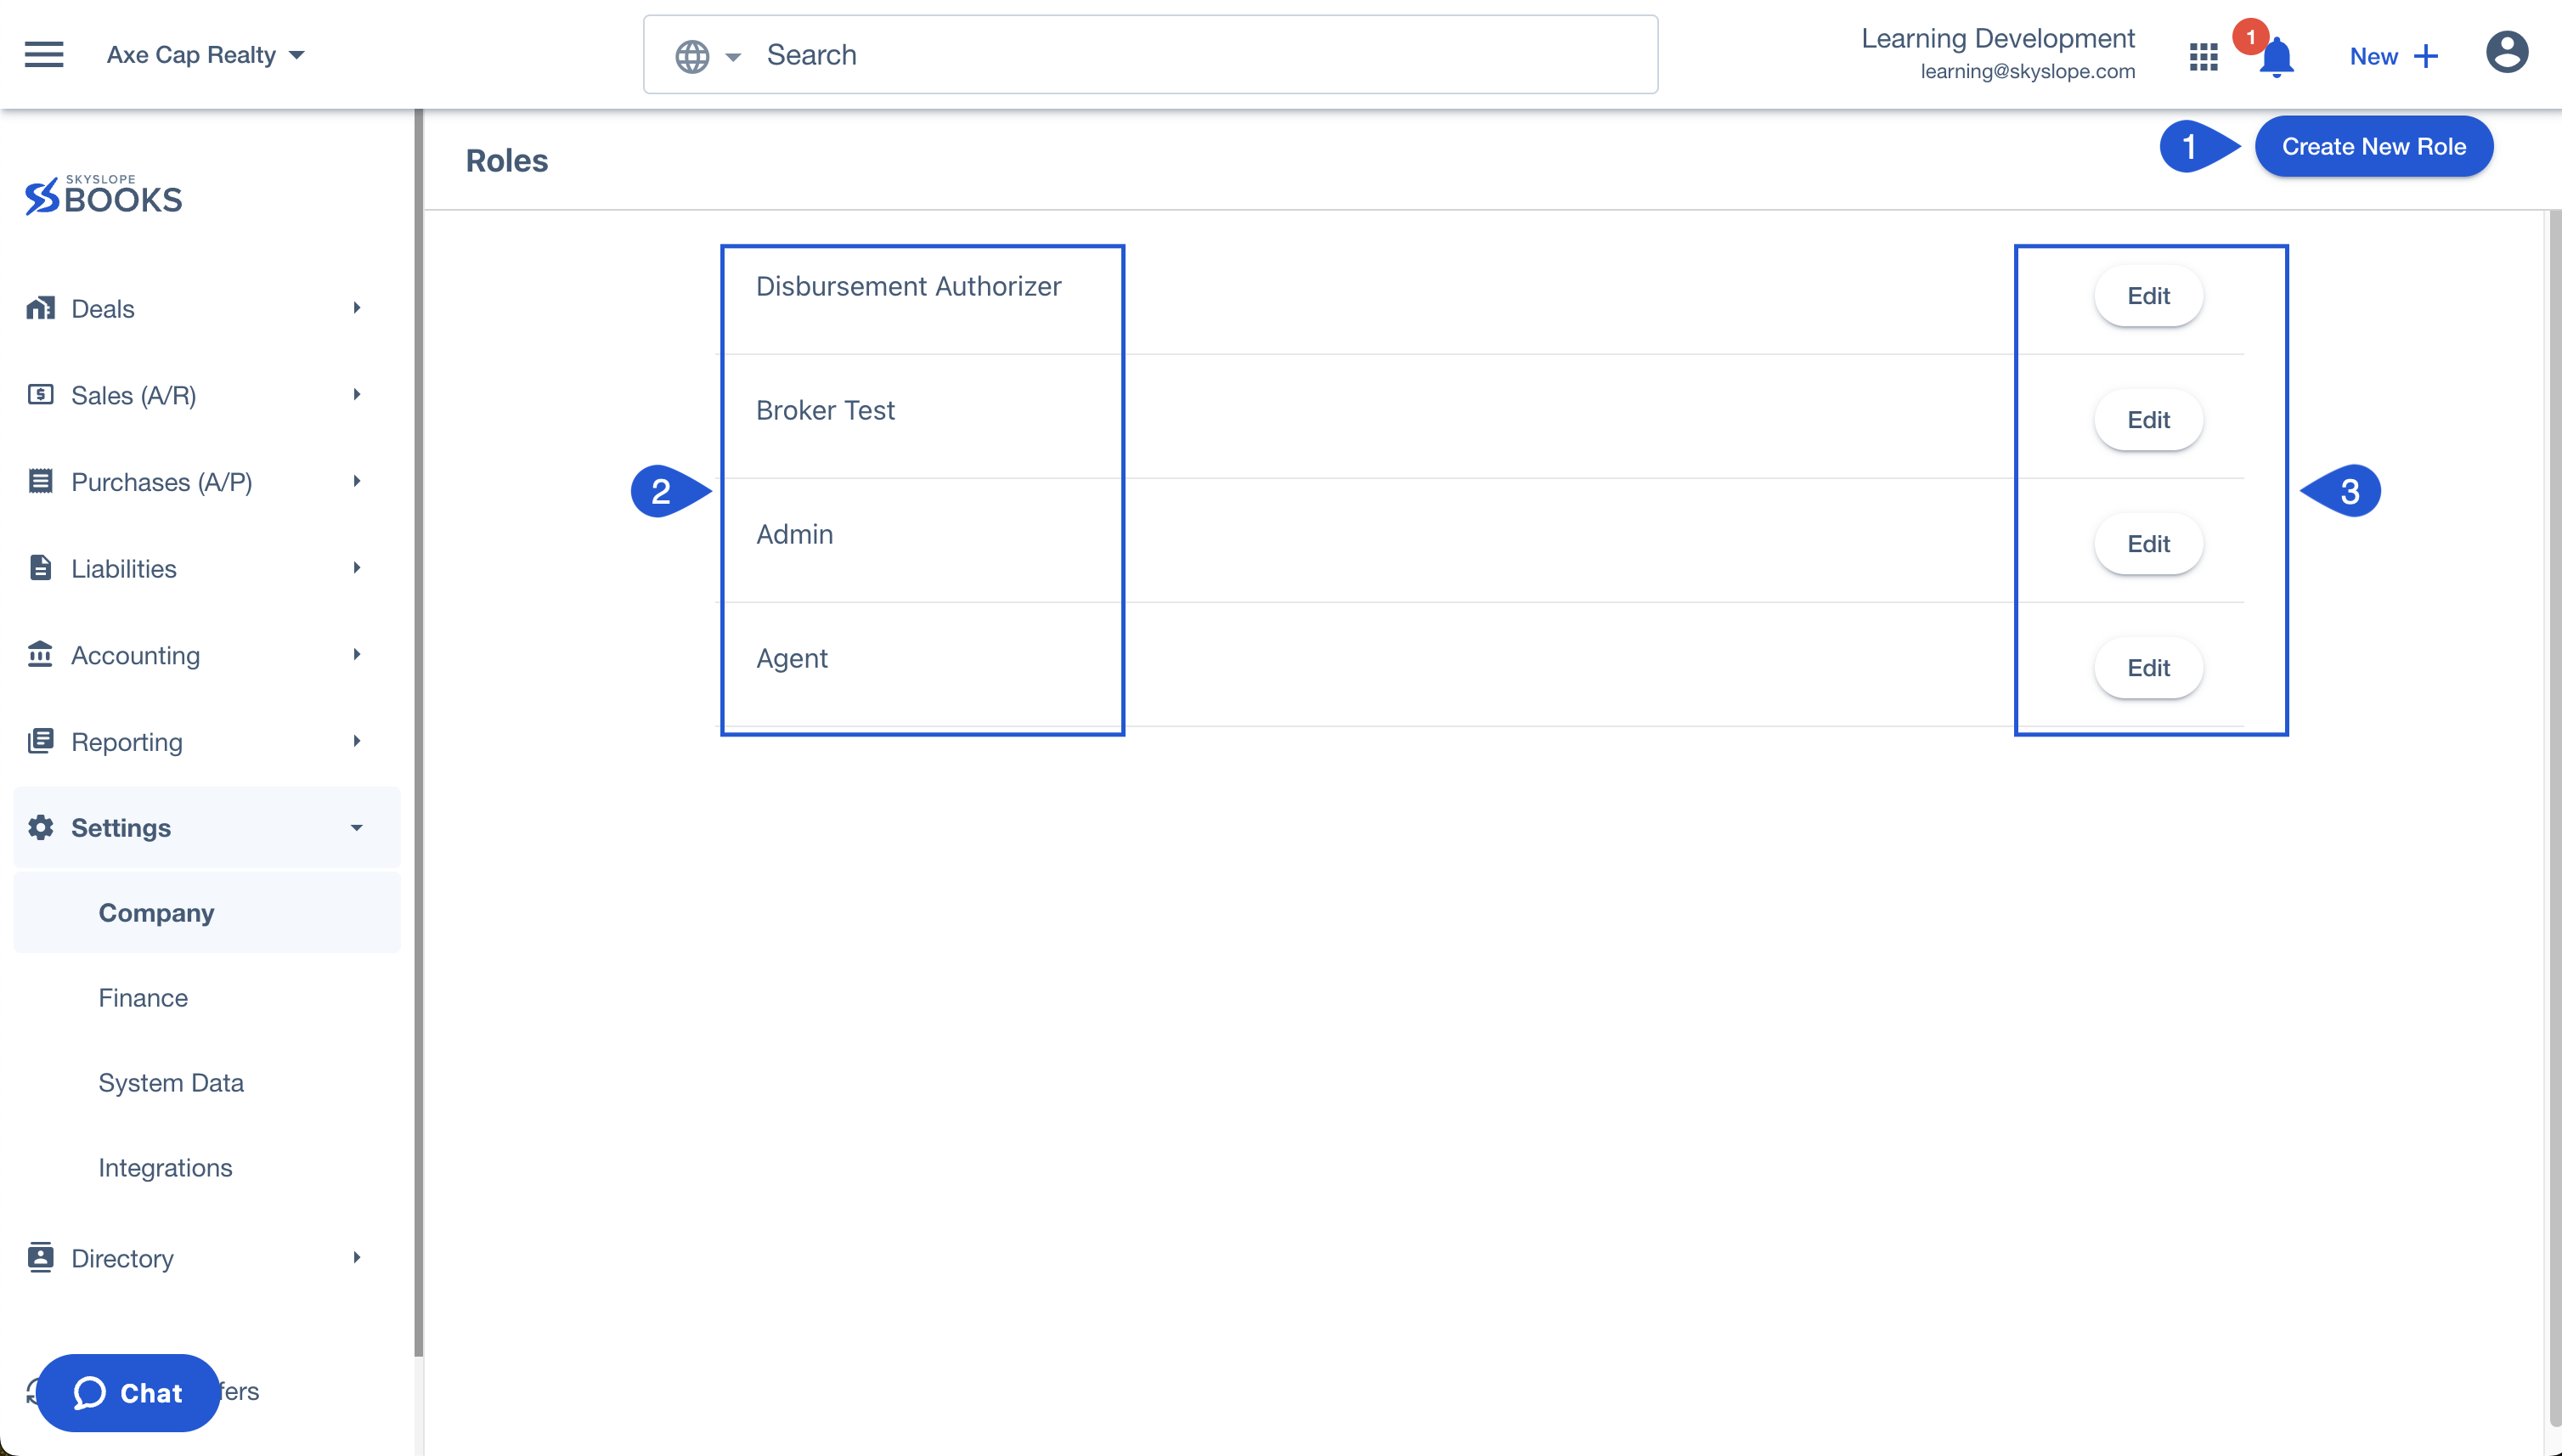
For the above image, reference the purple number to learn about that item's action:
#1 - Use this button to create a new Role.
#2 - Here, you can see the names of Roles that were previously created.
#3 - You can click the Edit button to make changes to current Roles.
Creating Roles
1. Click Create New Role in the upper right.
2. Enter the name of the new role in the Title field.
3. You can now enable the toggle for the different modules you want this Role to have access to. Enabling the toggle shows you a table with a list of permissions for the specific module

Toggle ON: ![]()
Toggle OFF: ![]()
5. When you turn the toggle for any permission to ON, you will have any of the following options:
-
View: The user will only be able to view.
-
Create: The user will be able to create.
-
Edit: The user will be able to edit.
-
Delete: The user will be able to delete.
-
Manage: The user has access to all of the above access levels.
6. Once you have checked the relevant permissions, click Save Role.
7. The new Roles will now be available on the Roles page.
Editing Roles
Once a Role is created, you can edit it at any time.
1. On the Roles page, locate the Role you want to edit. Click Edit.
2. Make any of the necessary permission changes.
3. Click Save Role.
Deleting Roles
1. On the Roles page, locate the Role you want to edit. Click Edit.
2. On the Edit Role page, scroll down and click Delete in the lower right corner.
3. You will be asked to confirm if you want to proceed. Click Confirm to proceed and delete the Role.
Note: If this Role is assigned to any Profiles, it will be removed.
4. Once a role is deleted, it will no longer be visible on the Roles page, .
Was this article helpful?
That’s Great!
Thank you for your feedback
Sorry! We couldn't be helpful
Thank you for your feedback
Feedback sent
We appreciate your effort and will try to fix the article