Introduction
SkySlope Books allows users to import contact lists in the easiest way possible. This will include Customers, Vendors, and outside/cooperating Agents.
This feature helps you track all the users that you're doing business with. It is basically your Phonebook in the SkySlope Books ecosystem.
Note: Do not include Agents within your own brokerage in your Contacts in your import.
Click to open Template of Contacts Import CSV
Be sure to check out our REMINDERS before getting started.
CSV Format
In this section, we will look at the columns in the CSV format for SkySlope Books. The fields listed below appear from left to right on the CSV.
- Contact Unique Key (SkySlope Books Internal Reference Number - Leave Blank, this will be auto-generated)
- Display Name (required)
- Company Name
- First Name (required)
- Last Name (required)
- Preferred Name
- Email Address (required - must contain prefix and domain - e.g. [email protected])
- Telephone
- Country Code (If blank, Import will default to US Code +1)
- Phone Number (Do not include spaces)
- Fax Number
- Location Name
- Address Street Number
- Address Street Name
- Address Unit Number
- City
- State (Do Not Abbreviate - Requires Official State Name e.g. California)
- Postal Code (5 Digit Postal Code)
- Country Code (2 Digit Country Code, e.g. US)
- Contact Category
- Directory Status (SkySlope Books Internal Reference Number - Leave Blank, this will be auto-generated)
- Class
- Contact Person Unique Key (SkySlope Books Internal Reference Number - Leave Blank, this will be auto-generated)
- Contact Location Unique Key (SkySlope Books Internal Reference Number - Leave Blank, this will be auto-generated)
- Payroll Type (Available Options: 1099-NEC / W-2 / Blank)
- Payroll Name of Recipient (Required for Payroll Type 1099-NEC & W-2. Legal Name as listed on tax document)
- Payroll TIN Type (Required for Payroll Type 1099-NEC & W-2. EIN / SSN)
- Payroll TIN Payroll (Required for Payroll Type 1099-NEC & W-2. Do not include spaces)
- Start Date (Required for Payroll Type 1099-NEC & W-2. Format MM/DD/YYYY)
- Payroll Filing Status (Required for Payroll Type 1099-NEC & W-2. Joint / Individual)
- Payroll Withholding Amount
- Payroll Extra Withholding Amount
- Payroll Other Income
- Payroll Deductions
- Payroll Location Name
- Payroll Street Number
- (Required for Payroll Type 1099-NEC & W-2. Street Number Only)
- Payroll Street Name (Required for Payroll Type 1099-NEC & W-2. Street Name Only)
- Payroll Unit Number (Required for Payroll Type 1099-NEC & W-2. Unit Only, e.g. Apartment Number or Suite)
- Payroll City (Required for Payroll Type 1099-NEC & W-2.)
- Payroll State (Required for Payroll Type 1099-NEC & W-2. Do Not Abbreviate - Requires Official State Name. e.g. California)
- Payroll Postal Code (Required for Payroll Type 1099-NEC & W-2. 5 Digit Postal Code)
- Payroll Country Code (Required for Payroll Type 1099-NEC & W-2. 2 Digit Country Code, e.g. US)
- Contact Payroll Unique Key (SkySlope Books Internal Reference Number - Leave Blank, this will be auto-generated)
General Reminders
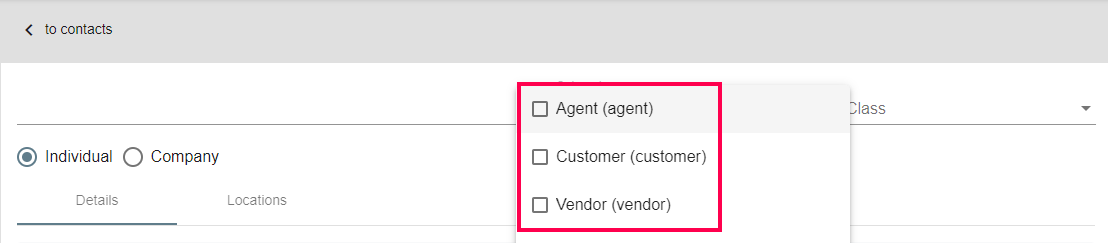
1. SkySlope Books has the following three categories by default:
- Agent
- Customer
- Vendor
If you have more categories, create them in SkySlope Books first before starting the import.

2. If you are creating an individual contact, leave the Company field empty.
3. If you are creating a company contact, leave the Display Name field empty.
Importing Contacts
Follow the steps below to learn how to import the contacts CSV file into SkySlope Books.
1. In the left navigation panel, go to Company > Data.
2. This takes you to the Data page.
3. To import Contacts, click the Import/Export button at the top right of your screen.
4. Next, choose Import from the dropdown menu.
5. Select Contacts, you can now choose the file from your computer for import.
6. Once the file is uploaded, you will see a success message at the bottom right of your screen.
7. Click Create Contacts to import them to SkySlope Books.
8. You will see a notification at the bottom right of your screen.
9. On successfully importing your contacts, you should see a success notification.
10. The Status will also update to Imported.
11. You should be able to see your imported contacts on the Contacts page.


Was this article helpful?
That’s Great!
Thank you for your feedback
Sorry! We couldn't be helpful
Thank you for your feedback
Feedback sent
We appreciate your effort and will try to fix the article